This How To topic covers the steps required to request an electronic transcript be sent to another school.
Navigation
Main Menu>Records and Enrollment>Transcripts>Electronic Transcripts>Electronic Transcript Request
Steps
Upon following the navigation above, the Electronic Transcript Request search page appears.
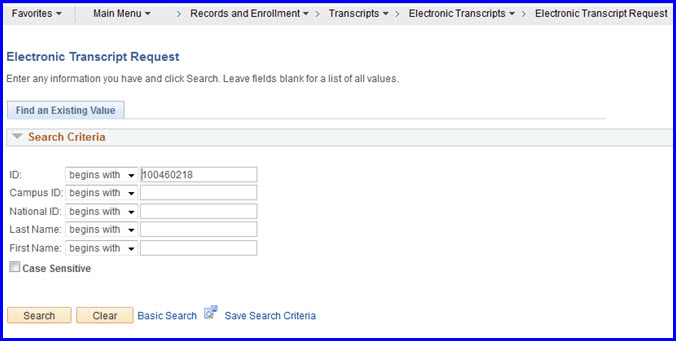
1. Enter the student's EMPL ID or Last Name/First Name and click Search. The request interface appears with the Transcript Request tab active.
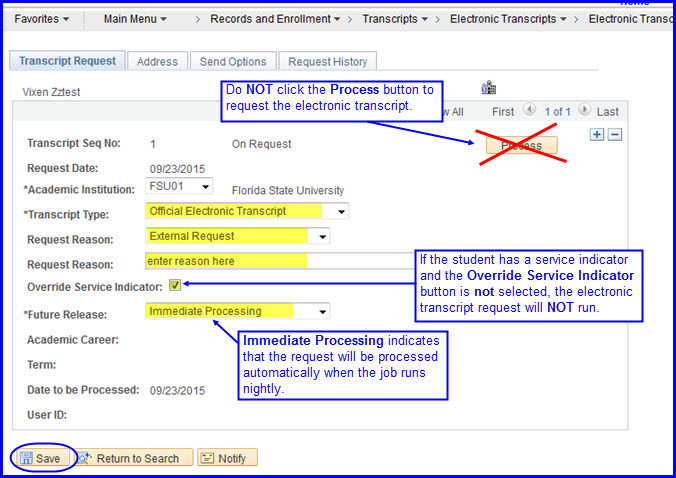
2. The Academic Institution drop down box defaults to FSU01.
NOTE: If an error message appears here, it could be because the student does not yet have any FSU credits.
3. In the Transcript Type drop down box, select Official Electronic Transcript.
4. In the Request Reason drop down box, choose the request reason. External Request indicates an outside entity is requesting the transcript. Other likely reasons are Student's Request and Web Transcript Request.
5. If one of the preconfigured Request Reasons does not work, you can type the reason in the second Request Reason drop down box.
6. To generate the electronic transcript if the student has a service indicator (SI), the Override Service Indicator check box must be selected. If the student has an SI and this box is not selected, the transcript request will not run and no transcript will be generated.
7. The Future Release drop down box defaults to Immediate Processing, which indicates that the request will run with the next job processed. The job runs nightly. Other options include:
- Degree Confer Date,
- Grades Post,
- Hold,
- Specific Date, or
- Transfer Credit Post
NOTE: Selecting any one of these alternative options requires you to provide additional date information: either the term or the specific calendar date. Fields for supplying this information appear according to your selection.
8. After making your selections, click the Address tab.
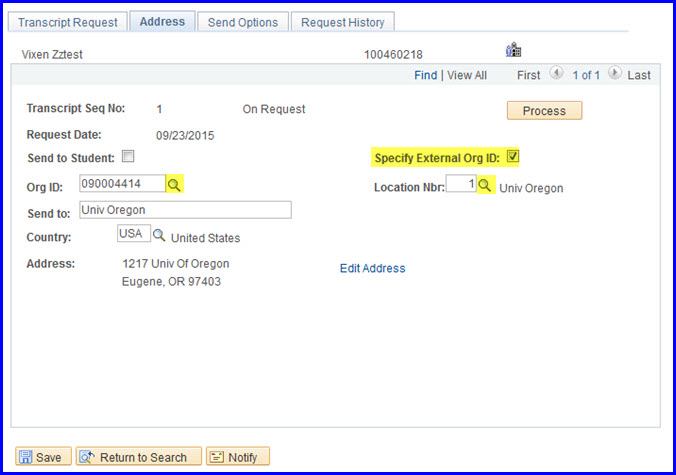
9. Select the Specify External Org ID check box.
10. Click the Org ID Look Up button to access the Look Up Org ID search interface.
NOTE: One way to locate the school in question if you're not sure of the name is to choose contains as the operator in the Description drop down box, and type a word contained in the school's name. In this example, Oregon was chosen.
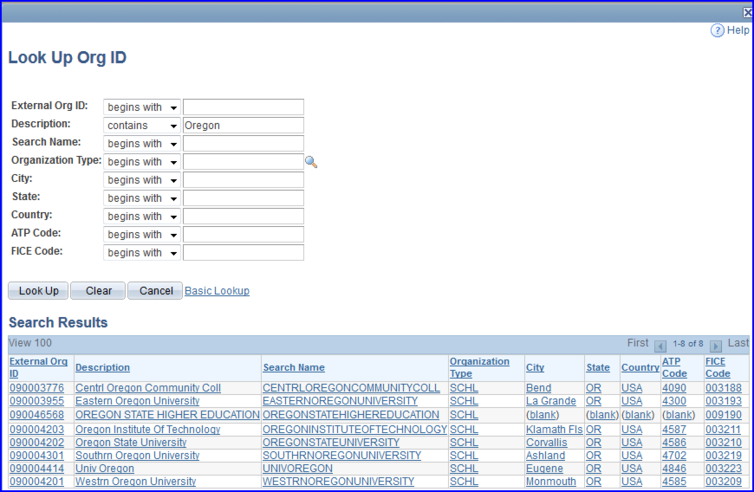
11. Click the appropriate school's row. In this example, the University of Oregon was selected. Selecting a school populates the Org ID field with the school's External Org ID.
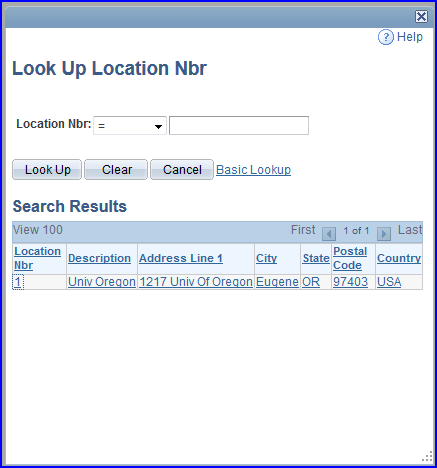
12. Click the Location Nbr Look Up button to access the Look Up Location Nbr search interface. Often the institution will have only one mailing address, but it's best to ensure you're sending to the correct address by reviewing the options. If the school has more than one mailing address, click the appropriate address line and the address appears on the Address tab.
13. Click Save. The transcript has now been added to the queue for generation and electronic submission to the specified school.
CAUTION: Do not click the Process button to queue up the transcript request!
14. If you need to send the student's transcript to another institution(s), click the Transcript Request tab and repeat steps #3-#13.
